Miyerkules, Setyembre 21, 2011

MY TOP 10 FAVORITE DEADLY STRIKE IN ANIME

10. Yusuke's Demonic Spirit Gun


An ultimate version of his Spirit Gun, where an intense concentration of energy is released to create a devastating energy attack capable of annihilating anything. He learns this upon receiving Raizen's power, and kills Shinobu Sensui with it while under Raizen's control. It is unnamed in the manga and anime, but called Demonic Spirit Gun in the card game.


9. Gon's JaJanken


JaJanken which is a play on the japanese word "janken" which refers to the game of "Rock, Paper, Scissors". The unusual name of his hatsu was created when Gon stuttered when informing the hunter Knuckle Bine that his hatsu was called "janken".

Rock - Gon focuses the aura around his fists using Ko and releases it in a punch. Rock is a close range attack, and has the strongest power among the three.


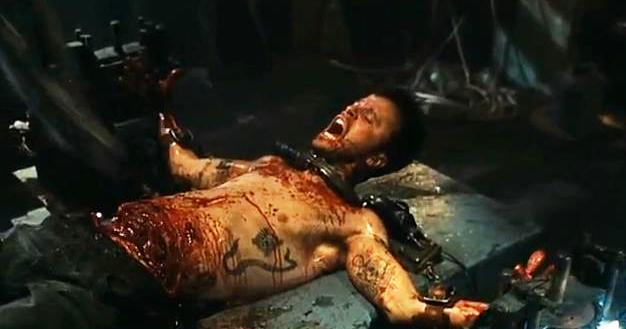
8. Natsu Dragneel's Hidden Fire Form: Crimson Lotus: Phoenix Sword


Hidden Fire Form: Crimson Lotus: Phoenix Sword : Natsu ignites his entire body with the power of the Flame of Rebuke. He then charges towards the enemy and delivers a devastating punch that blows up the enemy, then proceeds to headbutt him. This is also described as The Ultimate Dragon Slayer Technique and the Dragon Slayer's Hidden Art, Sea Fire Style. This could be Natsu's strongest attack, as not even Flame Lotus: Exploding Flame Blade was able to defeat Zero's strongest attack, though this may be because Exploding Flame Blade focuses on piercing penetration instead of mass destructive damage. This unstoppable and destructive attack was used to defeat Zero.


7. Tsuna's XX Burner


The XX Burner is a vastly more powerful version of Tsuna's X-Burner. It makes use of his Vongola Gear enhanced Cambio Forma and the new contacts and headphones prepared by Spanner. Tsuna is able to fire "Hard Flames" from both hands, while "Soft Flames" are released from his Vongola Gear Cambio Forma's arm thrusters.
Once Tsuna releases this technique, highly powerful flames are released. Natsu seems to power these flames as well, as the front of the flames are shaped like him. These flames are of such intensity and power that even large black holes disperse upon being hit.

The XX-Burner's power when shot with its full destructive potential
The XX-Burner can be fired in two ways. The first method is using the Sky Flame's "Harmony" attribute. Using this method, the XX-Burner fires, but doesn't reach its full destructive capability.
The second method uses the more destructive attribute of the Sky Flame. Using this method, the XX-Burner causes an extraordinary amount of damage, not just to its intended target, but to the surroundings as well.


6. Kenshin's Amakakeru Ryū no Hirameki(Heaven-Bridging Dragon Spark)


The "Heaven-Bridging Dragon Spark" is an incredible Hiten Mitsurugi-ryu's secret technique. (Note the "spark" as in inspiration not fire or flame.) It is a two-step Battōjutsu move and comprises of two strikes. The first is the draw and then the user spins around for a second strike such as the Sōryūsen~Ikazuchi. The user draws leading with the right leg; to avoid slashing his/herself. The Heaven-Bridging Dragon Spark follows with a quick left, but in order not to cut his leg or lose the momentum of the swing. The user brought that final step just after drawing his/her sword. That single step adds force and acceleration using the Shinsoku of Hiten Mitsurugi into the even faster Heaven-Bridging Dragon Spark. Though it is just one step, being that much closer to the opponent; brings the user that much closer to the opponent's zone. Thus the user is in the thin line between life and death, and cannot have hesitation in his/her technique. Then if the opponent blocks the first strike, the air pushed out by the block creates a vacuum by the spining for the second strike. This is the one defense against the "Nine Headed Dragon," attacking the opponent before he/she does, with god-speed and Battojutsu technique.
Hiko descibes this move as "Even if one's opponent dodges the fangs of the dragon in flight, still they shall be caught by the wind of it's wings...and be shredded by its claws."

Oddly enough Enishi is able to counter the move with speed of his "Frenzied Nerves" enhancement. He also survived the "Heaven-Bridging Dragon Spark" without rendered utterly immoblized.


The Amakakeru Ryū No Hirameki is battōjutsu that surpasses Shinsoku. This is the key to defeating the Kuzu-ryūsen. Because the Kuzu-ryūsen is a charging technique that cannot be blocked, an attack must be made before the Kuzu-ryūsen arrives, thus the true nature of the final technique: the Amakakeru Ryū No Hirameki must be faster than a regular battōjutsu in order to hit the opponent. The secret behind the technique lays in an additional step with the left foot. This single step alone adds instantaneous acceleration and weight to the sword changing the god-like speed of Hiten Mitsurugi Battōjutsu to "Beyond god-like speed". However, this extra step is difficult to take as one of the fundamental teaching of battōjutsu states that one should step forward with the right foot as to avoid cutting their own foot with the attack. As such, the additional step forward with the left foot can spell certain death for the swordsman, as it takes precise timing to coordinate, as to not lose any momentum while drawing; it requires the utmost concentration, that can only be obtained by one's desire to live.
There is another secret to this technique. If the initial strike is avoided or blocked, the force of the unusually fast slashing motion displaces the air around it, generating a vacuum in its wake and sucking the opponent in. As this happens, the body is spun around for a second strike, the previous action adding force and momentum to the swing, making the subsequent strike far stronger. This is the true power of the Amakakeru Ryū no Hirameki. As Kenshin's teacher Hiko Seijuro said, Even if you were able to avoid the fangs of the flying dragon, the gusting winds strip away freedom of movement, and the claws would rip you apart.
"Amakakeru Ryū no Hirameki" is so fast that its implementation can be successful even when the enemy's strike has actually reached the user's body, as in Rurouni Kenshin manga volume 14. As depicted, Shinomori Aoshi's signature Kaiten-kenbu Rokuren attack has actually begun to cut into Kenshin's neck when Kenshin released the attack, and blows Aoshi back before he can even finish. The invincible attack "Amakakeru Ryū no Hirameki" is the final technique of the Hiten Mitsurugi Ryū.
In order to perform the attack flawlessly, the user must be in peak physical condition and there must be nothing inhibiting their application of the technique.


5. Makunochi's Dempsey Roll


After Ippo's fourth title defense against Shimabukuro Iwao, the Dempsey Roll's weakness against counters became apparent to boxers all over Japan. Not wanting to drop his best weapon, he works to improve it. The result is a Dempsey Roll that stops and starts abruptly, avoiding counters and throwing off the opponent's rhythm. However, the sudden movements put a great strain on the legs and hips, and overuse can cause permanent injury. Ippo first uses it to defeat Sawamura Ryuuhei in his fifth title defense.
However, Genji Kamogawa already indicated that the Dempsey Roll still isn't complete and could be improved.


4. Gokou's Super Spirit Bomb(Chou Genki Dama)


A larger and more powerful version of the Spirit Bomb used by Goku. Goku's attack of gathering spiritual energy from the entire planet into a huge ball, and proceeding to throw it. Its strength is equal to how much energy it absorbs. It made its debut in the 285th episode of the Dragon Ball Z anime, "People of Earth Unite". It was powered by the energy of every person on the newly revived planet Earth. It was used as a final attack to defeat Kid Buu on the Supreme Kai's planet.

After Goku's Super Saiyan 3 power diminishes because he is too tired from the intense fight with Kid Buu, Vegeta orchestrates a plan to create a Spirit Bomb strong enough to destroy Kid Buu. The plan is to resurrect the then destroyed Earth and to bring back to life everyone on the planet. That way every person will give their energy to the Spirit Bomb. The other Z Fighters and their friends and family hear Goku and Vegeta's voices and give their energy to the Spirit Bomb. However, the people of Earth simply ignore them, since they have doubts about the voices.

Mr. Satan convinces the people to give their energy to him so he can destroy Kid Buu. With Mr. Satan's encourage, all of the people of Earth give their energy to the Spirit Bomb, making the Super Spirit Bomb. With the Super Spirit Bomb finally complete, Goku launches the attack at Kid Buu.
However, Kid Buu is strong enough to stop the attack and push it back at Goku, who is too exhausted to stop it. Dende then uses Porunga's last wish to restore Goku's strength back to normal. With his strength back, Goku transforms into his Super Saiyan form and pushes the Super Spirit Bomb back at Kid Buu. After several moments reflecting over the events that led to this moment and wishing he would come back as a better person so they can fight again, Goku destroys Kid Buu once and for all.


3. Ichigo's Final Getsuga Tenshou


A technique acquired from the Bankai form of Ichigo's Zanpakuto Spirit, Tensa Zangetsu. While using Jinzen in Bankai, Ichigo enters his inner world were he is forced to combat a composite of his bankai's form of his Zanpakuto spirit and his Inner Hollow who did not want to teach Ichigo the new technique.

While determined to use combat to attain the technique is not until Ichigo discards his plans to fight for it that he attains It. As the Final Getsuga Tensho is something that can only be acquired by accepting Tensa Zangetsu's blade.

Thus Ichigo had to allow himself to be ran through. The blade in turn didn't hurt him, as the blade is Ichigo's so therefore he would feel no pain from it if he accepted it. From accepting the blade Ichigo received the understanding of what using this technique will mean for him as well as the essentials of the technique.

The Final Getsuga Tensho is when he becomes Getsuga. If he uses this technique he loses all his Shinigami powers. Thus why its called "Final".


2. Naruto's Nine-Tails Chakra Mode


The Nine-Tails Chakra Mode is a form that Naruto gained after he separated and sealed the Nine-Tails from its chakra. He can access its chakra directly whenever he needs it without interacting with the beast at all. In doing so, he gains a chakra shroud that resembles the Sage of the Six Paths' silhouette. The colour of his eyes changes from blue to orange when he is in this form. Also, while the demon fox shroud is red and releases chakra as acidic bubbles, this form's shroud is yellow and releases chakra as flickers of flame. The chakra in this form also emanates light in darkness. This is probably due to its colour.
With the Nine-Tails' power under his control, Naruto's strength is significantly increased to the point where he can push a fully formed Tailed Beast Ball through a multiple layered barrier. His greatly increased speed surpasses A's, even while clad in his Lightning Release Armour at full power. Killer B had trouble determining if Naruto's speed was from the Body Flicker Technique, as all he saw was a "yellow flash" when Naruto attacked Kisame Hoshigaki, who was hidden inside Samehada. This form's chakra shroud gives Naruto great protection, but he noted that it would have been dangerous if A had gotten a clean hit on him. It is also shown to be superior to Naruto's Sage Mode as when he entered this form, he easily managed to break out of a Shadow Imitation Technique while in the latter form, he couldn't. Naruto can also use the shroud's chakra arms to help him create new Rasengan variants, such as the Spiralling Strife Spheres, the Spiralling Absorption Sphere, the Mini-Rasenshuriken and the Planetary Rasengan for example. The chakra arms give Naruto greater range of attacks as well as greater dexterity and manoeuvrability with his fighting style without the use of shadow clones. He has yet to complete the technique related to the Tailed Beast Ball: the Tailed Beast Rasengan.

Like his predecessor, Mito Uzumaki, Naruto also gains the Nine-Tails' ability to sense negative emotions, even while he was inside a chakra isolation chamber within the Falls of Truth, something that not even the best sensor-type ninja can do. Due to having the Nine-Tails' Yang chakra in this form, Wood Release techniques will react to the chakra's life-giving properties and mature into full-grown trees within a matter of seconds, either by contact or close range.

However, using the Nine-Tails Chakra Mode is a huge risk. Naruto has to temporarily "shelve" his own chakra in order to use the Nine-Tails' chakra, which allows the Nine-Tails to automatically drain his original chakra. If the Nine-Tails manages to take all of Naruto's chakra, he will die. In addition, the Eight-Tails advised him against the use of the Shadow Clone Technique, as the Nine-Tails would absorb every portion of Naruto's chakra even faster for each clone he makes. Because of this same reason, Naruto has to limit the amount of time he spends in this mode. Despite these risks however, once he was on the battlefield, Naruto deployed several of his shadow clones while in this mode to the different divisions to confront the White Zetsu Army, which indicates that the risks associated with this form are not instantaneous. He has shown to stay in this form for an entire night and most of the morning during the Fourth Shinobi World War, much longer than that of Sage Mode.


1. Luffy's Gear Third


Gear Third is where Luffy pumps air through his bones to make them literally gigantic. Obviously, only Luffy can do such a thing by using the Gomu Gomu no Mi. Used with his already-strong physiology, this apparently gives his arm more mass and a larger area to attack with far greater force, but he sacrifices mobility for this strength, as his limbs are now so large that Luffy has extreme trouble moving unless he is in his Fuusen form. Another after effect of this is that Luffy is reduced to child-sized proportions, the duration of which is equal to the time he spent in Gear Third. Also, he is able to use both gears at the same time which he uses to defeat Gecko Moria. This technique is first hinted at during Luffy's fight with Blueno, and first used, but not shown when Luffy is chasing Rob Lucci and Spandam, but is not seen until a later battle with Rob Lucci.

After the timeskip, Luffy's Gear Third is vastly improved upon. Previously, Gear Third would increase the size of the majority of Luffy's arm, thus reducing the speed of the attack in exchange for a powerful impact. However post-timeskip Luffy can seemingly control where the air is allowed to "sit" within his limbs, where his fist becomes large but allows a large mass to form behind the fist as the equivalent of the mass he would have achieved having his arm fully inflated. This allows a majority of Luffy's arm to remain as it is, allowing him to stretch it, thus allowing him to attack much faster than before the two-year absence.
Luffy is also shown using Gear Third at the same time as Busoshoku Haki causing his arm to turn black and harden (possibly undergoing vulcanization), with his arm in the ocean (which would normally drain a Devil Fruit user of their power). While he is affected by the ocean, he still lands a punch which knocks the Kraken out. After the attack (Gomu Gomu no Elephant Gun), Luffy appeared to remain the same size without shrinking temporarily, indicating that he may have overcome this side effect at some point during his training. Or like in the manga version of Marineford, Oda skipped it.

Biyernes, Setyembre 16, 2011

MY TOP 10 FAVORITE SAW TRAP

One of the primary focuses of the Saw film series are the traps that the character John Kramer a.k.a. Jigsaw, and his apprentices, Amanda Young, Mark Hoffman, Lawrence Gordon (and occasionally his ex-wife Jill Tuck) create for their victims. In the movies, the serial murderer, Jigsaw, places individuals into traps for having wasted or misused their lives; each trap serving the purpose of testing the victim's will to live. As such, these devices force subjects into near-death situations where they are typically given the opportunity to either save themselves or die. In accordance with Jigsaw's ideology, the traps are meant to act as a form of immediate rehabilitation for the subject upon completion, supposedly rewarding the survivor with a new lease on life and ridding them of their vices (that is if the subject doesn't fail and die, which is usually the case in the films).

10. THE CAROUSEL


- The fourth test, The Carousel Trap, was revealed in a teaser clip to promote Saw VI. The trap consists of six of William's junior associates: Aaron, Emily, Gena, Dave, Shelby, and Josh (in order of when they were stopped by the carousel), chained to a rotating roundabout-like object inside of a large metal cage. At the front of the cage is a large metal device attached to a shotgun which is pointing at the carousel. The carousel repeatedly slows to a halt with a random victim facing the gun. William is forced to make the choice to place his hand inside a metal box and press a button, causing a metal rod to pierce his hand in order to prevent the selected victim from being shot, or choose not to and let the victim be shot point-blank in the chest by the gun, thus killing the person that is in the gun's path. Unfortunately, William is told that he can only save two of the six people on the carousel and in the end, William chooses to save Emily, the second and Shelby.

Tape: Hello, William. Before you are six of your most vauable associates, the ones who find errors in policies. Their findings result in order two-thirds off all applications denied or permaturely terminated. Now you must apply your analysis to them, and will you be able to find their errors? Six ride the carousel, but only two can get off. The decision of which two survive falls upon you. But remember, the mounted gun will continue to fire until all six rounds are spent. And if no decision is made on your part, all six will perish. To offer the two reprieves, you must press both buttons at once in the box before you, however in doing so, you will give a sacrifice of your own. Two can live, four will die. Your decisions symbolized by the blood on your hands.

9. THE KNIFE CHAIR


- A drug addict named Cecil was placed in what was referred to, first in an interview, as the Knife Chair, later revealed to be Jigsaw's first created trap. He woke up with his arms bound to the armrests of a wooden chair, with blades jutting upwards into his forearms. A panel level with Cecil's face was connected to the arm restraints. Pushing it forward would have released the restraints and freed him. Jigsaw, who was present in the room, applied a large apparatus to the chair, consisting of eight blades enclosed around Cecil's head. Jigsaw then instructed Cecil in what to do, telling him that to release himself from the chair, he had to force his face through the blades to push the panel, matching his "internal ugliness" by scarring his face. Cecil, after sitting and screaming for help, began pushing his face through the knives while Jigsaw watched; however, before Cecil could complete his test, the faulty chair collapsed. Standing up with the restraints still lodged in his arms, Cecil threatened to kill John, and lunged at him. Jigsaw side-stepped, causing Cecil to fall into a pile of hanging razor wire where Jigsaw left him to die.

8. THE SCALPING SEAT(the hair trap)


- A woman named Brenda was dressed in a red cloak and a pig mask, chained to a device with numerous gears and a dial. A tape recorder was duct-taped to the palm of her left hand, and her long hair was twisted though a metal ring and wound up along an axle connected to the gears. She was trapped in a room in Rigg's apartment with dozens of photos of herself pimping young girls, posted and hung around the room, with the words, "SEE WHAT I SEE" scribbled above a bookcase beside her. Rigg entered the room, setting off a digital timer which began counting down from 90:00, and found Brenda panicking, trying to escape from her chains. A television in front of her turned on, and Rigg was told by the Billy puppet that Brenda was a criminal and he advised him to just walk away from the situation and let Brenda die instead of giving into his obsession of saving everybody. Rigg pulled the pig mask and cloak off of the woman, pulling a trigger-pin that was attached by a cord to the mask,[10] activating the machine. A one-minute timer began counting down as the gears on the device began turning, arching Brenda's head back as her hair was pulled and wound along an axle. After having her gag removed, Brenda screamed for help, telling Rigg to hurry, and that the combination for the dial was hidden on the gears. She continued to scream for help while Rigg scrambled around looking for something to stop the device. Upon opening a drawer, he found a card that read "Time is wasting." Brenda's hairline began to rip and spurt blood before Rigg returned and tried shooting the machine with his handgun, causing the machine to stall for a few seconds before it reactivated and continued to scalp Brenda. Rigg began reading numbers on the cogs twisting her hair and programmed the code, 6-4-7, into the dial on the machine, releasing Brenda, although half of her scalp had been torn from her head.

7. THE CLASSROOM TRAP(the body chains)
This trap featured Troy, who awoke in an empty school classroom, with eleven chains hooked into his flesh at various points on his body. Upon awakening, a television placed directly in front of him switched on and Billy the puppet appeared on the screen, informing Troy that his reason for being tested was because he had been sent to jail on many different occasions (for unspecified reasons). The recording continued on to explain that if he wished to survive, he would have to break free of the chains attached to his body before a timer expired, which would detonate a nail bomb also placed in front of him, and he would die in the resulting explosion. The chains were hooked into his lower jaw, shoulders, arms, hands, obliques, legs, and achilles tendons. When the recording finished, the timer initiated and Troy began to painfully rip out the chain links from his skin, one chain at a time. Troy managed to detach all of the chains from his body with the exception of the one attached to his jaw. The chain ring was looped through his lower jaw, which appeared to be impossible to remove in time. Because he was unable to unhook this last ring, he was killed when the timer triggered the bomb.
Tape: Hello, Troy. I want to play a game. This game will take place in a room not much bigger than a room you spent most of your life in: a prison cell. Despite all of the advantages and privileges that you given at birth, you have returned to prison again and again. More comfortable in chains than you are in freedom? Tonight, we will see how far you are willing to go to break those chains once and for all. Live or die, Troy. Make your choice.


6. THE HORSE POWER


- A man named Evan wakes up, glued to the driver's seat of a car that is propped up on its hind wheels. Evan is told by a tape placed in the tape deck of the car that his friends are in the garage with him and are also a part of his game, and that in order to prevent them from dying through a chain of events, he must reach a lever located in front of him on the outer side of the windshield within 30 seconds. One of his friends Dan is located behind the car, with his arms and jaw chained to the rear end of the car, and his body to a pole behind it. His girlfriend Kara is strapped down underneath one of the propped-up wheels, and his third friend Jake is chained to the garage door directly in front of the car.
In order to pull the lever, Evan has to reach forward and tear a massive portion of his skin off to disconnect from the car seat. The stationary car is also slowly accelerating as the timer counts down. Evan eventually fails to reach far enough in time and the car's hind wheels are released, causing one of the wheels to fall onto Kara's face, crushing it. The accelerating car then speeds in the direction of the garage door and rips Dan chained to the car's arms and jaw off, while speeding through and ultimately killing Jake chained to the garage door. The trap ends with the car having a head on collision with another empty car outside of the garage and Evan being thrown through the window by the impact.


5. THE REVERSE BEAR TRAP(the jaw trap)


- This trap was applied to a heroin addict named Amanda Young, whose wrists were bound with duct tape to Added by Angela armrests on a chair in a dimly-lit room, with a heavy metal apparatus hooked into her upper and lower jaw. The Jigsaw Puppet (a.k.a. Billy) appeared on a television screen before her and revealed that Amanda had a short amount of time to remove the trap from her head before it would snap open in a similar fashion to that of a bear trap in reverse, which would rip her jaws wide open in the process. To emphasize this point, a demonstration was shown to Amanda, who watched as the device went off on a mannequin head, which exploded as the device activated. The puppet told her that the key that she needed to remove the device was in the stomach of the "dead" Donnie Greco lying across the room from her. As the tape ended, Amanda was forced to wriggle her hands free from the duct tape, at which point she stood up, pulling and snapping a trigger wire that set off the one-minute timer on the back of the contraption. She quickly raced over to Donnie and found that he was not dead, but heavily drugged with a strong anti-mobiliser, Amanda desperately took the scapel and cut through his stomach and retrieved the key out of the man.


4. THE DEATH MASK(the venus fly trap)


- This trap was similar to an iron maiden device, but on a much smaller scale. The trap consisted of a harness, attached to the victim's chest, which was only removable if the key to the padlock was obtained. Attached to the harness was a contraption which consisted of two metal masks, opposite from each other and angled down from the victim's head. Each mask had several nails protruding inwards from the interior. The device was connected to a spring timer, and if it wasn't removed in time, the two masks would clamp together on the Added by JMLVP victim's head, in a similar fashion to that of a Venus Flytrap, and drive the nails through his skull. The victim of this trap was Michael Marks, a police informant. He woke up in an empty room, and found himself in the helmet. In order to remove the device, Michael was instructed that he would have to find the key to the harness, which he soon learned, from a video tape and some X-rays of his own skull, was hidden behind his right eye. Supplied with a scalpel, he attempted to surgically remove his eye, but found that he couldn't bring himself to do it, and threw the scalpel across the room in anger. The timer expired, and the masks snapped shut on his head, killing him.


3. THE PUBLIC EXECUTION TRAP


- This trap takes place in a public square, specifically in a window display with bulletproof glass. Two men, Brad and Ryan, wake up chained to either end of a table with a circular saw resting in front of each person, aimed at their chests, and a third circular saw on a large pivot in the center, pointed towards the ceiling. A woman named Dina is revealed to be suspended above the center saw and restrained to a large, hanging board. Billy the Puppet then appears on his tricycle and reveals that Dina slept with both men, manipulating their love for her own material gain, making each commit undisclosed crimes in the process. Billy goes on to say that one person from the triad must die in this trap.

The three blades begin to spin, and the two men notice that the blades on the ends of the table are connected to a single sliding platform that they are both chained to. Likewise, they realize that pushing the sliding platform to one end of the table or the other causes the middle blade to drop, protecting Dina, but causing one of the other two saws to cut into one of the men. The two are forced to either push the circular saws toward the person on the opposite end of the table within 60 seconds, killing him and sparing Dina, or to do nothing while Dina is lowered onto the center saw and sliced in half at her midsection.

The trap begins with Brad and Ryan fighting to push the saws toward one another, with Brad initially gaining the upper hand. Dina begins to cheer for Brad, which enrages Ryan, giving him the strength he needs to push the saws toward Brad, cutting into his chest, but only inflicting a minor injury. Dina, realizing that Brad may lose the fight, then begins to cheer for Ryan. At this point, both men decide that Dina is not worth the struggle and that she has been lying to both of them the whole time. The game ends with Brad and Ryan deciding to stop fighting, allowing Dina to be lowered onto, and subsequently sliced in half by, the center saw.


2. THE PENDULUM TRAP


- Seth Baxter, a murderer who was initially sentenced to life in prison, was released a mere five years after his conviction on the grounds of an undisclosed technicality. Believing Seth didn't learn the impact of his crime, "Jigsaw" places him into a trap instead. Seth wakes up in a room, chained to a table, with two vices on either side of it. Above him, is a large, bladed pendulum that begins to swing after his tape is completed. Seth has to push buttons in the back of the vices that will crush his hands in order to stop the Pendulum from reaching his body, as his hands are the "tools" that caused harm to others. In sixty seconds, the pendulum will cut him in half if he doesn't succeed. Seth inserts his hands into the vices, but quickly pulls them out in fear. Trying again, he succeeds in crushing his hands and the Pendulum ceases swinging for a few moments, but after a short pause, the Pendulum reactivates and descends far enough to begin cutting into his abdomen, and eventually slices him in half, confirming that the trap was inescapable.

Tape: Hello, Seth. I want to play a game. Right now, you are feeling helpless. This is the same helplessness you bestowed upon others. But now, it's unto you. Some would call it Karma. I call it justice. Now, you served five years of what should have been a life sentence for murder. A technicality gave you freedom, but it inhibited you from understanding the inpact of taking a life. Today, I offer you true freedom. In thirty seconds, the pendulum will drop far enough to touch your body. Within sixty seconds, it will cut you in half. To avoid the pendulum, all you have to do is destroy the things that have killed: your hands. You must insert your hands and push the buttons to start the devices before you. Your bones will be crushed to dust. Will you destroy the things that have taken the life in order to save one, Seth? Make your choice.


1. THE GAME ROOM(the flesh scale)


- This trap is created to test two predatory lenders, Simone and Eddie, in the opening sequence of Saw VI. The two are placed in adjoining cells and each victim is equipped with a head harness with screws positioned on either side of it, poised to drill into their temples. Should one of them fail their test, the screws would drill into their skull with immense pressure, killing them. In order to survive, they are given a set of utensils to cut off their own flesh and toss it down a chute, onto a scale located between the cells. After 60 seconds passes, the subject that places the least weight onto the scale would have his/her headpiece discharge, drilling into his/her head.

The overweight Eddie takes an early lead by slicing off and tossing his stomach fat/skin onto the scale while Simone attemps to cut off her fingers, but has difficulty in bringing herself to do it. Meanwhile Eddie continues tossing more skin and fat onto the scale. Simone, running out of time, begins to cut her arm at the mid section, however, after seeing Eddie toss even more flesh onto the scale, Simone panics, and starts to cut faster. The drills begin drilling deeper, causing Simone to cut her upper part of her arm. Simone then notices that she is losing, so she grabs a meat cleaver and starting to hack away higher up her arm, severing it from her body. With only seconds to spare, Simone grabs her severed arm and tosses it down the chute, onto the scale, tipping the scale in her favor, and causing Eddie's harness to activate, drilling into his skull and killing him.


Sabado, Agosto 27, 2011

Introduction


Welcome to Plagiaristic Idea. Feel Free to share your thoughts, opinions, suggestions and Idea. Follow this blog for more updates and don't forget to leave your comments. Thanks.